How to Upgrade Your E-Bike Brakes for Maximum Stopping Power
Share
So, you've taken your e-bike to the next level by replacing the motor, batteries, and maybe even the tires. However, you failed to remember an essential item: your brakes. Because what’s the point of going faster than ever if you can’t stop before you meet the side of a building?
Let’s face it—stock e-bike brakes are often just okay at best, terrifying at worst. If you’ve noticed your stopping power is about as reliable as a politician’s promise, it’s time for an upgrade. This guide will walk you through exactly how to transform your e-bike’s braking system from “meh” to “holy cow, that stops fast!”

Cargo e-bikes like this RadWagon from Rad Power Bikes constantly carry heavy loads - Photo: theverge.com
Why Upgrade Your E-Bike Brakes?
Let's consider the why before we dig into the how. Given their weight and speed relative to standard bikes, e-bikes demand more braking force. If your stock brakes feel spongy, weak, or make stopping an adrenaline-pumping experience, upgrading them will:
✅ Increase safety – Because emergency stops shouldn’t feel like a coin toss.
✅ Reduce brake fade – Your brakes won't become mush on long descents.
✅ Better durability – Better parts save you money over time and last longer.
✅ Better control – More precise braking means better handling and fewer close calls.
Okay, enough small talk. Let's get down to business.
Step 1: Swap Out Your Brake Pads for High-Performance Ones
Why?
Your brake pads are the unsung heroes of your braking system. Low-quality pads wear quickly, lose stopping power in wet weather, and can make your brakes sound like a horror movie scream.
What to Upgrade To:
Sintered (Metallic) Brake Pads—Best for high-speed, heavy-duty braking. They last longer and handle heat well, but can be noisier.

Organic (Resin) Brake Pads—Quieter and provide better initial bite, but wear out faster under heavy use and in wet weather.
Semi-Metallic Pads—A mix of both worlds and usually a good compromise—you’ll get decreased noise but better stopping power. For clarity, semi-metallic pads are a type of organic brake pad but with a higher metal content.

How to Install New Brake Pads:
- Remove the wheel and unbolt the brake caliper (if necessary).
- Take out the old pads (don’t lose the tiny spring clip!).
- Insert the new pads, making sure they sit flush inside the caliper.
- Bed them in by doing 10-15 smooth, aggressive stops from a moderate speed to less than walking to transfer pad material onto the rotors. Never come to a complete stop during this process as it can cause uneven deposits on the rotor.
👉 Pro Tip: Sintered pads + large rotors = braking nirvana.
I show you how to change disc brake pads in this video.
Step 2: Upgrade to Larger Brake Rotors
Why?
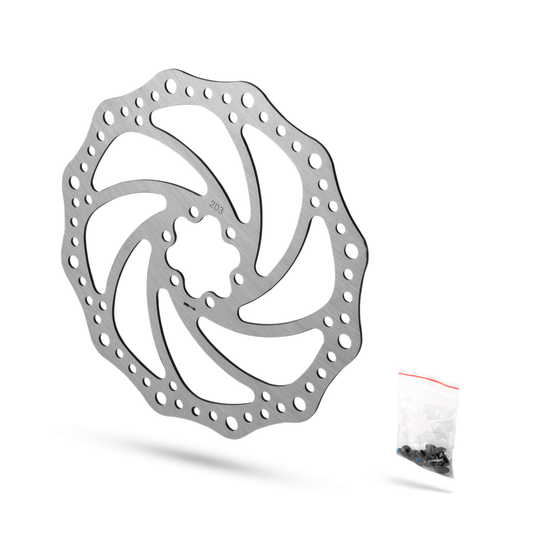
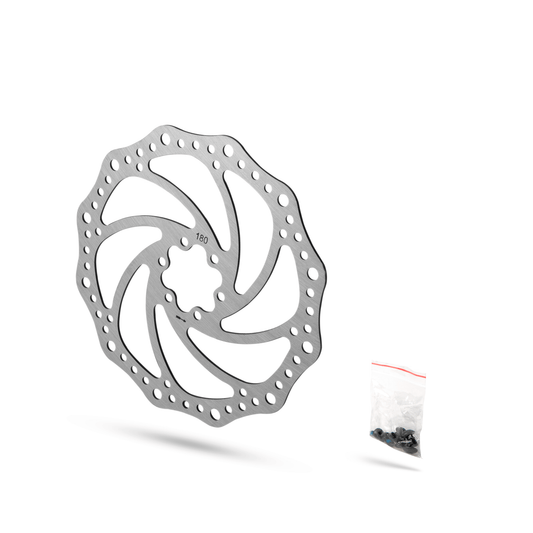
Bigger rotors = better stopping power. It’s simple physics. A larger rotor gives the brake caliper more leverage, which means more stopping force with less effort.
What You Need to Know:
🚀 Stock e-bikes often come with 160mm rotors, which are fine for regular bikes but laughably small for a powerful, heavy e-bike.
🚀 Upgrade to 180mm or 203mm rotors for a massive boost in braking force. Going from 160mm to 180mm is about a 12% increase in braking power and a if you jump all they way to 200mm it’s about a 22% increase.

🚀 Check your frame and fork can accommodate larger rotors (most can, but you’ll need an adapter which we stock). Manufacturers will tell you the maximum size of rotor the fork and frame are rated for.
How to Do It:
- Remove your old rotors with a Torx wrench, allen key or lockring tool (depending on your mounting system).
- Make sure your rotor bolts have fresh blue loctite on them. Then install the new larger rotors and tighten them to the correct torque spec (usually 4-6 Nm).
- If upgrading from 160mm to 180mm or 203mm, install caliper adapters to reposition your brake calipers so they don’t rub.
Step 3: Upgrade to Hydraulic Brakes (If You Haven’t Already)
Why?
If you’re still using mechanical disc brakes, your fingers are probably working overtime just to slow down. Hydraulic brakes use fluid instead of cables, which means:
💪 Less effort – More stopping power with a gentle squeeze.
🎯 Better modulation—No more all-or-nothing braking.
🛠 Less maintenance—No cables to stretch or fray. And the pads will automatically advance as they wear down.
How to Upgrade to Hydraulic Brakes:
- Choose a reliable hydraulic brake system (Shimano, Magura, SRAM, or TRP are great choices).
- Make sure your e-bike’s frame is compatible (most are, but check before buying).
- Install the new hydraulic brake levers, calipers, and lines.
- Bleed the brakes to remove any air bubbles (or have a bike shop do it if you’re not feeling confident).
👉 Pro Tip: 4-piston hydraulic brakes offer even more stopping power than 2-piston setups because of the larger braking surface area. Perfect for fast and heavy e-bikes!
Step 4: Bleed Your Brakes To Remove Water In The System
Why?
If you ride in hot conditions or do a lot of long descents, your brake fluid can overheat, leading to brake fade (a terrifying moment where your brakes feel like they stopped working). If you haven’t bled your brakes in awhile, water can work its way into the hydraulic fluid, diluting it, and lowering the boiling point,
How to Upgrade Your Brake Fluid:

Adding Some Mineral Oil To The Master Cylinder - Photo: ambmag.com.au
- Check if your brakes use mineral oil (Shimano, Magura) or DOT fluid (SRAM, Hope, TRP).
- Use the manufacturer’s specified brake fluid like Shimano’s Mineral Oil or SRAM DOT 5.1 fluid.
- Bleed your brakes as per manufacturer’s recommendation and replace the old fluid with fresh, high-performance fluid.
👉 Pro Tip: DOT fluid absorbs moisture over time, so change it every year for peak performance.
Step 5: Fine-Tune Brake Lever Position & Bite Point
Why?
The position of your brake levers affects how quickly and comfortably you can stop. If your levers are too far out or too close to the bar, you might be losing braking efficiency.

Brake lever adjustments on a SRAM Guide RSC - Photo: tetongravity.com
How to Adjust:
- Angle your brake levers downward (around 30-45 degrees) for natural wrist positioning.
- Use the reach adjustment knob or screw (if you’re lucky enough to have one) to bring the levers closer if needed.
- If your brakes have a bite point adjustment (usually found on higher-end model brakes), tweak it to get quicker engagement.
👉 Pro Tip: A properly set up brake lever can shave milliseconds off your reaction time—and that can be the difference between stopping on time or stopping too late.
Final Thoughts: Stop Like a Pro!
Upgrading your e-bike’s brakes isn’t just about power—it’s about confidence and safety. Whether you’re bombing down hills, commuting through traffic, or just enjoying a casual ride with your family, better brakes mean better control, safer stops, and less stress.
If you only do one upgrade, go for larger rotors and better pads. If you want maximum stopping power, go all-in with hydraulic brakes, a fresh bleed, and dialed-in adjustments.
🚲💨 Now get out there and stop like a pro—before your e-bike stops for you (unexpectedly). 😆


